Brief History
The Elco 80 PT Boats were built of wood using laminated spruce, white oak and mahogany and covered with fir plywood. They were considered expendable and 260 were built serving in most parts of WW11. They were powered by 3 Supercharged Packard 12 cylinder engines of 1500hp each giving the boats a top speed of 41 to 43 knots. They carried 3000 gallons of 100 octane aviation fuel with a total weight of up to 61 tons. Crew consisted of 3 officers and 14 enlisted men.
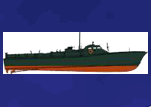
PT 596 was a late version armed with Mark XIII roll off torpedoes, twin 50.cal Browning Machine guns, 2 / 5-inch rocket launchers, a 20mm Oerlikon, a 37mm M9 gun and a 40mm Bofors on the rear deck. This particular vessel was part of the US Naval Pacific Fleet RON Samar based in the Philippines in 1945. There she was decommissioned there and probably destroyed.
|
|
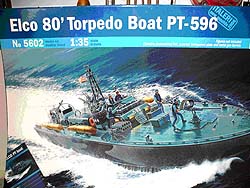
Click the Box Art Images for a larger view |
As you can see by the Box Art that this is a large model by any standards. The whole package is impressive and packed with features not normally seen in kits today.
There is a 48 page Photographic reference manual giving the history of PT Boats during World War 11 in the US Navy and the role they played. Lots of close up and colour shots.
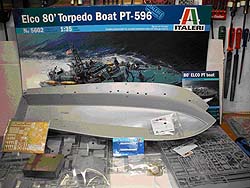
The 30 page assembly instruction manual is clear and well set out and should be easy for all to understand. Also included is a Photoetched Fret as well as Metal gun barrels, small mesh sheet and the 370 parts in light grey plastic all packed in plastic envelopes.
Elco First Build Program
I suggest you read this again when you purchase your kit as it will make sense once you have the components in front of you. I have not attempted to include any after market products but will use a little ingenuity later on in the build to add a little more dimension to the model.
I have gathered as much information on this build as I could and have added those points that I thought could help the build and give a better result to this project.
First up a reviewer had trouble with paint separation when removing tape after painting and I suspect that as this was straight after the model launch that mould release agent from the press was probably the cause so I washed the deck and hull with sugar soap and abrasive cloth and let them dry in the sun. This should solve the problem now and head off any potential disaster.
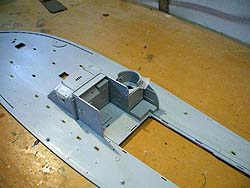
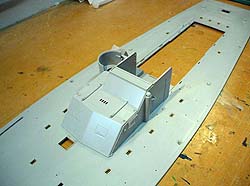
The deck comes together easily and the photo etch deck skylights frames fit quite well. Mark the openings with a pencil before gluing as all the openings are not used i.e. the rear four is not used. I was fooled. (click the deck element photos below for larger views)
|
|
|
|
|
|
|
|
Undercoat individual parts |
Final colour |
Now another hint I picked up was not to install the acetate windows other wise you will have a fiddly job masking as the deck will be painted as soon as the toe rails are on. I will come to that point later.
Now there has been a lot of discussion as to the colour scheme and whether it is correct as shown on the box art or the very informative booklet supplied with the model but I decided to steer clear of that controversy and stuck with colour scheme
In pages 44 45 46 of the Reference Manual supplied.
I used Tamiya Paints as I have them and they spray very well. Also I don't have a decent Hobby Shop within 200kls. I got an excellent match to the colour drawings
By mixing … RLM Grey XF22 80% and 20% Deep Green XF26. Building this large plastic model gives the modeller the opportunity to experiment with various painting techniques. I was glad to be able to use my air brush as well as the reliable brush.
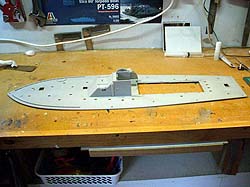
The deck and hull were given 3 coats each and left to harden .I feel this is important as it is mentioned often by other modellers who maintain that some model paints are slow to cure. I sometimes employ the hair dryer to help when in a hurry. Whilst this was happening I dry fitted the helmsman station and controls panel together to ensure all fitted well as it did… then proceeded to assemble but without the control station..
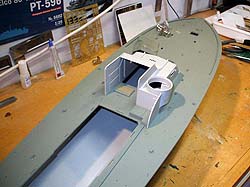
This needs to be painted first and the transfers and controls fitted. Taking them off the sprue I painted the steering wheel silver as well as the throttles and the photoetch surround. These will be installed after the console is painted.
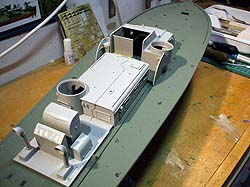
Whilst at it I painted the foot grating Desert Yellow XF 59 to look like timber and will do the seats the same .And finally returning to the now dry deck I brushed the underside of the deck skylights with white PVA glue as it will dry to a hard but clear finish giving the impression of toughened glass. The kit does supply cut out plastic but these could be a problem with painting the deck and masking. On checking the next day the glue had dried clear and looked good. The three deck houses were painted the same colour as the deck and hull and will not be joined until the hull is spayed and the camouflage complete.
|
|
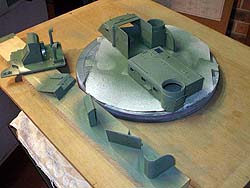
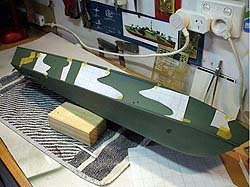
Camouflage paing scheme |
Masking with double-sided tape and blu-tac |
|
|
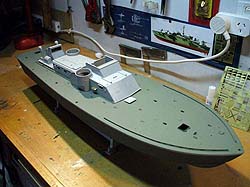
Trial fitting of components |
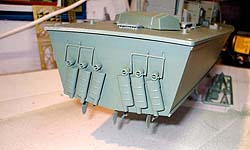
I should have painted anti-fouling before
installing the exhaust mufflers
|
EDITOR'S NOTE: In one of the photos which Mr. Rogers provided -
the mufflers are attached to the model wrongly -
they should be angled in and not out -
as he has them appearing in the photo. |
|
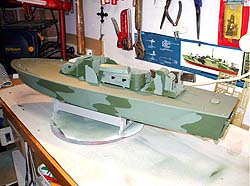
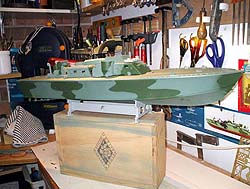
Final Camouflage Coat |
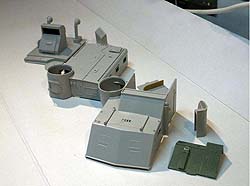
The best way to build this boat is to build each section separately dry fitting for accuracy and painting the modules as each is finished and standing it aside as shown in the following photos.
|